Posts mit dem Label Food werden angezeigt. Alle Posts anzeigen

Mittwoch, 13. März 2013

My Papaya story {papaya maneki pepe}

When I started for India I was pretty concerned about the whole food situation. What would they eat. Would it be 'balanced' enough (sorry I'm a health nut...most of the time), where there enough fruits/veggies etc.
They are quite a lot of fruits and vegetables actually. But, here's the thing: we mainly only eat bananas.
(Ok, ok. I know that might sound like whining. But if you consume all the fruits you'd normally eat with eating just bananas...well you might get into some...trouble). So. I was craving some other fruits. In fact I was craving Papayas. I mean they have Papaya trees here! It shouldn't be that hard to find myself a nice papaya fruit, right?

I actually got a papaya at one of the little huts right next to the street. And he gave it cheaper to me than he had asked for in the first place...
Anyway, only than it actually occurred to me that I might have brought everything with me....except for a knife. So how do you handle a papaya(!) without a knife?

My attempt on a papaya without a knife

You'll need: One papaya, one plastic bag (hence: No cutting board) and: Scissors!!
Behead the papaya and keep on cutting randomly until you have two halves...something weird yet? And absolutely crucial at that point: wipes!
Ehm yes.... Turned out that's why I got the papaya cheaper...never trust anything you get cheaper without doing anything for it!! That's so not ripe yet...and maybemaybe it's just me not being clever enough to picking a ripe papaya...are they in season yet anyway?!...oh well.
 So no papaya for me and back to bananas and feel free to leave tips on how to pick ripe papayas...I'd really like to know!

Montag, 18. Februar 2013

My baking addiction {Or the-addiction-to-everything-sweet and some heavenly carrot cake recipe}

The last weeks have been tough (I mentioned that before, didn't I?) but I guess I can really say it's better now. Little girls have to grow up at some point, right?! And as a huge relief I also discovered that it wasn't just my mood and certain things that pulled me down. No. It was the weather. You don't trust me? Well you better do. Because we had the first real sun and blue sky in four weeks TODAY! Say that again in your mind: Four weeks. Four! As in four weeks equals 28 days, as in sun-the-last-time-when-I-was-still-in-Vancouver (huge sight). I never noticed...but that pulls you down.
Anyway. We had sun today and I'm heading towards even more sun, so I guess things are improving right now. (So much for the usual randomness...)
 
To some totally different things....Somehow I sometimes wish I could say I don't like sweets. However.
That's so not true.
Like really.
Because: I love sweets. 

(Seriously. Who doesn't!?) Not sweets as in the kind of gummy bears (I actually really don't like those!) but I love chocolate. And I love frosting. And icing. And moist and gooey cakes, cupcakes, bars, cookies, peanut butter, sprinkles, crumbs, icing, chocolate sprinkles....I think I made my point.
So. Especially recently I spent a lot of time in our kitchen (haha probably way too much). But oh, well.
Here is what happened in our kitchen recently.

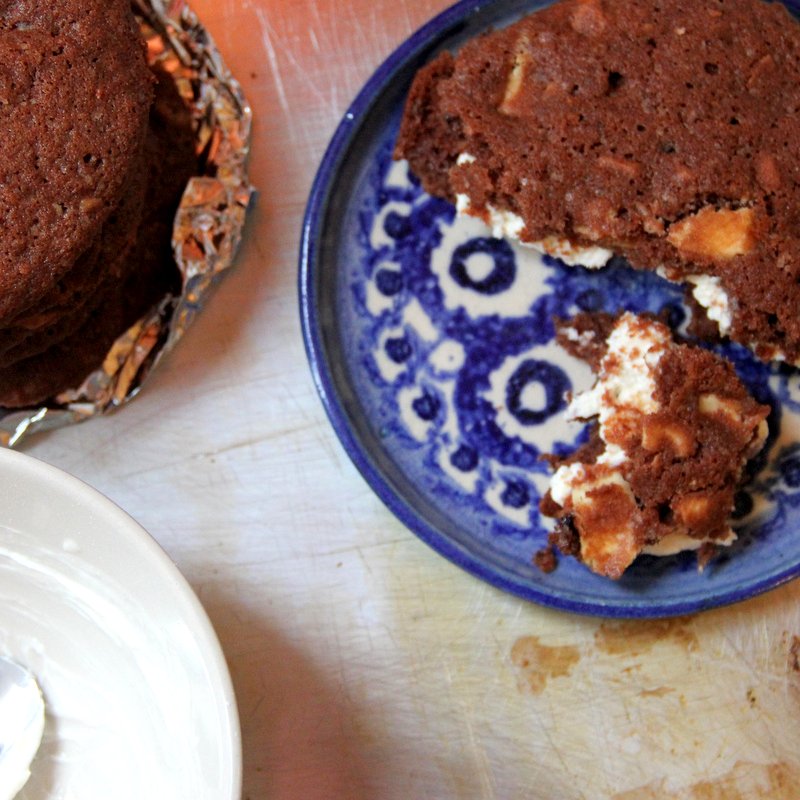
Something with peanut butter and chocolate
More peanut butter (this recipe) though it turned out quite moist (super moist that is) and pretty heavy but oh so delicious!
Chocolate and frosting
That was my mums boyfriend's birthday
We had this cake last week
And jep, I totally put my cake pops into our butter! Figure...

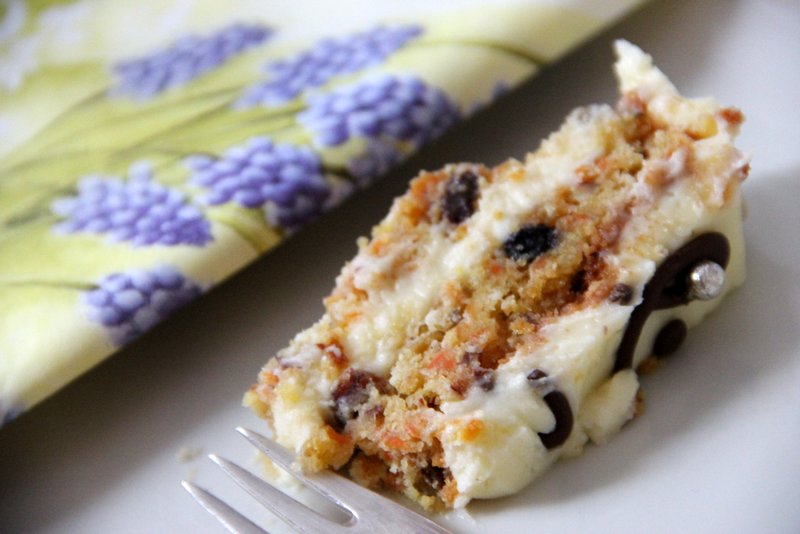
Serious stuff I tell you! But I love the whole process of baking just way too much. So it sort of came in handy that it was my grandpas birthday this weekend. (Oh just as a short side note: I'm trying to get some information about my flight, I hate those voice machines...and their music). Anyway back to my grandpas birthday. I, of course, baked something for him. Carrot cake with cream cheese frosting to be more specific. The best I ever had to be a 100% honest. And so I thought (and also because it comes in handy to just give out the link to that post to everyone who asked for the recipe ha!) I'd just go ahead and share it here on my blog. (so much for random side information)

I got the original recipe from here (pinned on my pinterest "sweets♥" wall). It just went as it always does. I was kind of in a hurry to lazy to go out and buy all the stuff I was missing and I'm probably just not good and following recipe instructions. So here is my version of the original recipe.


Heavenly carrot cake with cream cheese frosting

  • 2 eggs
  • 1 cup (225gr) brown sugar 
  • 3/4 cup (170gr) butter 
  • 1 cup (120gr) flour 
  • 1/4 cup (60ml) buttermilk (or, since we never have buttermilk, simply use milk, add some lemon juice and let it stand for a couple of minutes)
  • 1/2 flask vanilla essence
  • 2 teaspoons baking powder
  • pinch of salt
  • 1 teaspoon cinnamon
  • pinch of nutmeg
  • 2 cups (~260gr) carrots
  • 1/2 (75gr)cup currants or raisins (I used currants)
  • 1 cup (~140gr) chopped hazelnuts
For the frosting (which I actually followed step by step...except you'll need half of it. So you'll end up with:)
  • 1 stick butter (115gr)
  • 12 oz. cream cheese (340gr)
  • 1 teaspoon vanilla essence
  • 2 cups icing sugar (220 gr)
  1. Preheat oven to 350°F/180°C
  2. Beat together butter and sugar. Add eggs and vanilla essence.
  3. Whisk together flour, baking powder, cinnamon, salt and nutmeg.
  4. Add flour mixture to your butter mixture alternating with the buttermilk.
  5. Add the end, fold in: Freshly shredded carrots, currants and your finely chopped hazelnuts.
  6. Pour into your form and bake for 60-75 minutes (I did 70).
  7. Let your cake cool down (important!)
  8. Make your frosting by beating together the butter and the cream cheese. Add the vanilla essence and in smaller servings your icing sugar.
  9. Cut your cake into to disk.
  10. Spread icing on your first disk, apply your top disk and cover the whole cake with the remaining frosting. Decorate with chocolate, or nuts or whatever comes to your mind. 
The cake tastes best if you put it into the fridge for another couple of hours (or best: Over night) but I know myself just too well...so if you can't wait: Go ahead and enjoy ;)
(There are sadly not that many pictures...but you get an idea)

And I'm not too bad with cake toppers, am I?!
Otherwise it was nice to get together with everyone and get all the talking and story-exchanging done. It's family after all ;)

We weren't too lucky with the weather on our way to my grandpas. Snow, fog and darkness.
The fog stayed as well as the snow. At least for day one.
Alice in Wonderland comes true at my grandpas. Love it.
But even with all the snow and the fog...we had entertainment on hand
A lot of entertainment to be honest (Cat kisses ♥)
And some more distant relatives. But cute ones
She took over my phone with the camera...and did quite a good job (me sporting my cousins empty cupcake form haha)
At least a better one than she did on her plate (Meant are the photo and the unfinished cake cream...it was not my cake though....just so you know...)
So, now I'm off again to do things I'm actually supposed to do. Like pack. Or write down addresses. Or sew myself a bag...instead I'm writing on my blog. Priorities. Duh!
(Sorry for so many me-time-pictures...there are others as well...I'm just not too sure how happy their 'inhabitants' would be on making an appearance on my blog...so just me-time-pictures this time. Oh well)

Sonntag, 17. Februar 2013

Banana Blueberry Smoothie {Sunday Greetings}

Because it's cold and I love fruits.


You'll need:
  • 1/2 banana
  • 1/2 cup blueberries (fresh or frozen)
  • 1 1/2 cups mixed frozen fruits
  • 1/2 cup no fat greek yogurt
  • juice (orange or multi) add as desired for consistency
Blend together. Enjoy ;)

Donnerstag, 14. Februar 2013

Caramel dark chocolate bottomed creamy cheesecake

Yesterday I did say I'd post about my caramel-thingy-thing today. Though I'm dancing around in my Indian clothes getting all giddy and excited...and freaked out more and more by the minute so that sort of prevented the thing to happen yesterday...instead you get the recipe to this awesome cake today.


Anyway. Back to this caramel thingy. Which is so totally not a thing. It is a rich, smooth, creamy delicious caramel butter sauce. Oh yeah. And even better. That's just the part accompanying the, what I'd say, best homemade cheesecake I ever had in my entire life. Sounds dramatic. This needs drama! Because you have to believe me ;)
(I guess you already thought of it. Hence this long and not at all complicated title. But I do have to make a point! I love this cake!!!)

And the best part: It's super easy to make and doesn't call for any weird and special ingredients. The only difficult part is to restrain yourself to eat the batter before it goes into the oven and(!) to let this cake have its time to cool down (which I totally had not! It tastes good when its warm as well...just so you know)

Cake with caramel sauce
Moist chocolate cheesy goodness...
And the sauce is awesome on pretty much everything! Cake, Coffee, Ice cream....

And because for once I followed every single step from the original recipe. I'll just provide you with the link and lots and lots of mouth watering pictures ;)
Here you go! (Though I have a few tips!!)
  1. I added a bit more chocolate powder since I wanted a really dark base. I also like the stronger cocoa flavour.
  2. I did not beat the egg white separately and it worked out just perfect (ok. I have to admit: I was so looking forward to this cake and simply over read this step...no harm was done obviously ;) so for everyone who is as impatient as I am: Here you go!)
  3. I also added about 10 more minutes to the baking time (I waited for the center to rise just as much as the rim did)
  4. For the sauce: You'll need high heat! Not low. It took me about half an hour to make the sauce because it just wouldn't turn to this so beloved caramel color. After I turned my heat from low to high it worked. (Lots and lots of stirring until I got to that point, I tell you!)
  5. And: The whole thing has the consistency of bubbling lava while boiling! Don't be afraid. It turns out awesome!
And with that, one last point: I love how the sauce did turn out! I tried so many caramel creams/sauces/whatever before and they would always become hard and not spreadable in the end. This one did not! And even though it wasn't quite saucy at the end it was the best cream I ever had!


Enjoy ;)


Montag, 4. Februar 2013

Pear Chocolate Cupcakes {or better cake pops and a birthday party}

How was your weekend? Mine was long as it seems...
My mums boyfriend turned 50. We had quite a lot of people over on Saturday so my mum got a bit nervous about all the preparations. So (as for I didn't already spent the rest of my week in our kitchen) we spent Friday and Saturday there as well. It turned out quite fun since my mum is just as sunny and positive as I am (no sarcasm intended here :D). With the only exception: The kitchen. So it went on with her preparing for the worst and me trying to calm her down. Nothing went wrong on her side of the baking...my recipe turned out quite different than expected (and planned) but, oh well.

Her boyfriend had requested cupcakes or anything cupcake-shaped-like (from me) so cupcakes it had to be. I worked with this recipe from {never}homemaker but made a few changes (again. Maybe I should just learn to stick to recipes?!)
For the cupcakes: I have to admit I'm still a bit unsure if I actually like them or not. They are super moist (too moist?) and gooey. On the other hand I like moist and they weren't too sweet, which is definitely a plus. And after all, everyone really seemed to like them and I got two people asking for the recipe. (So I guess it's probably just me again, haha).

A second plus: After I applied my frosting (which was another disaster. Quite a lot of disasters with my baking this time. Though they all turned out well...) I had a few cupcakes left and as it turned out: They are simply awesome for cake pops!
Awesome!
Trust me!!

I've tried cake pops before and didn't like them. It was hard to make them, the chocolate would not stick to my cake pops or would cause them to fall of their sticks and I didn't like the taste.
Those were just perfect!!! Anyway here we go with my now disaster-proof recipe:

Makes about 28 small cupcakes
Pear Chocolate Cupcakes (adapted from{never}homemaker)
  • 6 tablespoons pear compote
  • 1 1/2 (350ml) cups milk (I could imagine that 1 cup (236ml) would work just fine as well)
  • 1 egg
  • 1 little flask of vanilla essence (suited for 500gr of flour)
  • 1 tablespoon white vinegar
  • 2 (240gr) cups flour
  • 2/3 (75gr) cup cocoa powder
  • 1/2 (115gr) cup brown sugar
  • pinch salt
  • 2 teaspoons baking powder
  1. Preheat your oven to 180°C/350°F
  2. Beat together the pear compote, the egg, the vinegar and the vanilla essence.
  3. Combine all dry ingredients.
  4. Alternating with the milk, add the dry ingredients to your pear mixture.
  5. Fill into forms and bake for approximately 20 minutes.
For the frosting:
The original recipe is in a peanut-butter-cupcake-style (I definitely will have to try out those later!!). But I had accidentally mistaken my pear compote for apple sauce and wasn't quite sure if this would go well with peanut butter (what do you think?) so I decided to go for the whole pear thing.
Yeah.
Apparently my idea to mix the rest of my compote in my cream cheese frosting wasn't such a great idea at all. I got this runny, funny looking something in my bowl which would do everything but definitely not set to any sort of frosting.
What I did than was accompanied by many concerns from my mum but it just worked out surprisingly perfect. I used vanilla pudding...
  • 200 ml milk
  • 1 sachet vanilla pudding
  • cream cheese mixture (Mine was 1 package cream cheese (200gr), 1 package (500gr) icing sugar and about 4 tablespoons pear compote....crazy sweet!!!)
  1. Prepare vanilla pudding according to instructions (Simply Go for 200ml of milk instead of 500ml since you're going to add your cream cheese mixture)
  2. Let it cool down for a bit (I'm horribly impatient so I could have probably waited longer...but who wants to wait, right!?)
  3. Beat together.
  4. Spread over your cupcakes.
 If you don't want to make it my disaster-style-like a bit less complicated: Simply mix together 30gr softened butter, 80gr cream cheese and 240gr (1 1/2 cup) icing sugar for an easy peasy cream cheese frosting. (You could go for a few additional pears in your decoration ;) )


If you want to go for the cake pops (and I highly recommend doing that!!) simply mix together your already baked dough with cream cheese (Sorry no quantity here. Just go for your preferred texture). Form small balls and let them rest one hour in your fridge.
Insert a wooden stick and dip in melted white chocolate. Decorate. Easy peasy!!
yeah I know...quite messy....

Since our house is really small we had to go into my mums studio. I loved it

Birthday table No. 1
Happy Birthday!! (I love this sign, we have it for as long as I can think (though I actually think my mum replaced it once since it consisted of more scotch tape than actual letters))
Mis-matched chairs ♥
Birthday table No. 2
And more mis-matching ♥
We had a total of four cakes, my cupcakes and cake pops...quite some baking I tell you
♥♥♥

Donnerstag, 31. Januar 2013

Brownie Cookies {Confessions and the normal stuff}

In all the mid-craziness around here I'm also trying to get rid of a couple of kilos I took with me from my time in Canada. Anyway. I'm not planning on loosing all what I've gained (There is nothing wrong with some curves, right? Right!...and I guess I'm also too lazy...) but I'm just used to a different body-feeling which I'm planning to get back.

So recently I've been trying to cut short on sweets and food in general. Not too much, but a bit. Also: Healthy! So a lot of vegetables, less to no meat, instead more tofu, yogurt etc. And sport (I've got rather creative since I've been used to bootcamp sessions by one of my friends but couldn't afford buying all the equipment. Maybe I'll post about it later).

So, thanks to our weather improvement (at least it got warmer. We don't want to talk about the heavy wind and rain) I was able to go for a first run in a long long time. Loved it.


But, let's face it: Everyone I need some sugar everyday if I could from time to time. And I love chocolate and peanut butter and cookies and cream (and probably everything your not supposed to have too often) but thanks to a certain approaching shitty week and my endless craving I decided I was in for a treat!


 Brownie cookies adapted from {never}homemaker
Her recipe is vegan (originally) and I also was too lazy to look for everything in my mums kitchen didn't have everything on hand she did...so I tweaked a bit...

Makes about 8 large cookies
  • 1/4 cup (55gr) butter
  • 1/4 cup (55gr) brown sugar
  • a few drops vanilla essence
  • 1 teaspoon ground flax meal (That's what the original recipe said, I wasn't sure what it actually is so I used 1 teaspoon flax seeds...worked!)
  • 1 shot milk (just a bit to for the consistency)
  • 1 egg
  • 1/2 (60gr) cup flour
  • 1 teaspoon baking powder
  • pinch salt
  • 1 teaspoon cocoa powder (the dark one)
  • 2 teaspoons cocoa powder (the one you use for hot chocolates)
  • a handful chopped pecan nuts
  • 50gr roughly chopped white chocolate
I didn't really had a lot of icing sugar left (The best proof you can get that I wasn't around for quite a while. Normaly where I am there is somehow icing sugar ate the end)
Flax seeds....not sure if this was what was supposed to be in it but it worked anyway

1. Beat together butter, sugar and egg.
2. Add vanilla essence and salt.
3. Add flour, baking powder, flax seeds and cocoa powder alternating with the milk.
4. At the end fold in the nuts and chocolate.
5. Pile onto a sheet of baking paper and put them into the oven at 180°C/350°F for about 15 to 20 minutes. Be careful: Mine spread out quite a bit!

They are super soft and gooey on the inside and light and crisp on the outside. I just love them! Especially if you make some cream cheese frosting to sandwich two cookies together...so you don't feel guilty about actually eating two...because you're not! Right!? It's ONE sandwich cookie!!!!!

ps - for the icing I just combined my leftover icing sugar and cream cheese with a tiny bit of milk. Original recipe I normally use can be found here.

And please ignore my nails. They are about to be done right now ;)

Enjoy ;)

Dienstag, 29. Januar 2013

A sneak peek on reality {and some color}


One of my friends made a comment on how my blog doesn't reflect my real life right now. Apparently I'm 'ways' (sorry for little insider grammatical mistakes) more down than I pretend to be.

Ok. I'm probably quite a lousy person to be around right now. All whiny (I hate whiny people). So I guess pretending I'm not on my blog just helps me focus on what I should actually focus on (that means: I'm still looking into a lot of Visa stuff and possible solutions to work abroad, I'm taking a closer look into TESOL diplomas, at the same time I'm also looking for Universities in Germany (and possible cities I could also be happy with), I got my India Visa today (and I'm starting to seriously freak out about that! Seriously! One second I'm so excited and can't wait to go, the next I'm freaking out and asking myself why I actually ever signed up for this. Why did I? Ah right...all this self experience thing....)) And all in between I get weak seconds and just start crying. Let's put it all on those female hormones. Right.

So here you go with a more honest post on what my life actually looks like right now.

And because the weather (with all this gray) doesn't help to improve things, I made myself some edible drinkable color ;)


Energizing color smoothie

Blend together in a mixer:
  • 1/2 pear
  • 1 handful fresh pineapple
  • 1 cup mixed frozen fruits
  • 1/3 cup orange/mandarine juice (mine was freshly pressed. Normal one works as well)
Soak up some vitamines and color and keep your head up! ;)